Steps to successfully generate a SLAM point cloud
How to turn on SLAM mode
-
- Connect your device via Wi-Fi to the unit and login to the Web GUI
- Scroll down on the Status page to the "SLAM Features" section
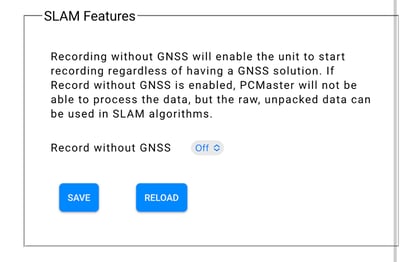
- Switch to "On" and wait for the device to reboot. You should hear the camera click.
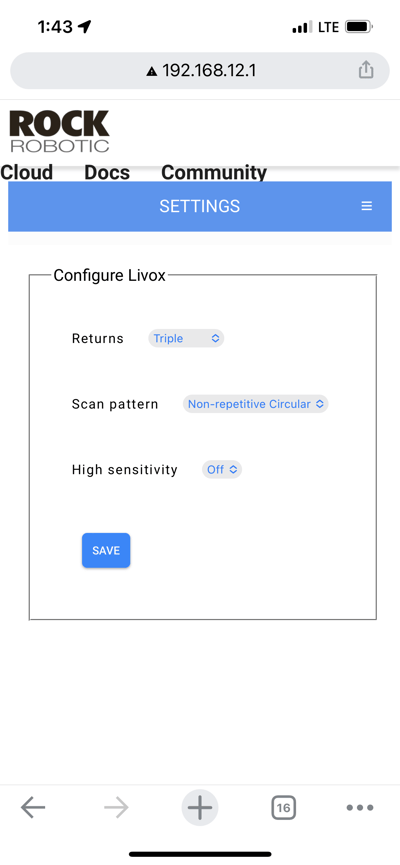
This will automatically change the scan pattern to Non-Repetitive Circular on the R2A and The R360 Scan Pattern is the same in SLAM or non-SLAM modes - Go into your device orientation settings and set the values to:
R360: 0,0,0
R2A: 0,0,180 (or same as aerial if you have a different configuration i.e., 0,0,0) - On the Status page, you can now name your file. This is VERY helpful for SLAM scans as the names are similar across scans.
Do not try to calibrate for SLAM against a wall, corner of a room, or flat surface
How to capture SLAM data
- Turn on your device while powered by a lipo battery or other source.
- Ensure SLAM mode is On, as above.
- Find a complex scene to calibrate on. For example, the corner of a building or any area that has multiple surfaces. The side of a building or just one wall indoors would not be a sufficient start point. See video below for details.
Hold the unit with the LiDAR on the bottom and camera on top. - Push the button on the unit, you should hear the camera click.
- Hold as still as possible for 10 seconds.
- After 10 seconds, slowly sweep the laser back and forth then begin moving for your scan.
When calibrating SLAM indoors, start the unit facing as many objects across a room as possible. Starting from the corner of a room facing the open field of view may work best.
How to capture SLAM data

-
- Use the R2A as a paintbrush, pointing it at the environment to be recorded using smooth sweeping motions.
- Hold the R360 in a position such that it is not blocked by your body. Holding it above your head is one way to do this.
- Please note that the camera will take pictures, but at this time the data is not colorized in SLAM mode.
Route Planning
SLAM processing relies on the LiDAR sensor and the inertial measurement unit (IMU) to estimate the location of the sensor ("trajectory") as you move. Creating a point cloud using SLAM processing can produce very accurate results but it is very dependent on the subject of the scan and how the operator scans the subject area.
"Drift" is your enemy with SLAM processing. Drift is when sensor movement occurs in real life, but the movement cannot be accurately determined using the data collected. During this movement mismatch between real-life and sensor data the processed trajectory (and therefore the resulting point cloud) will drift away from reality. This drift has two main causes:
1. Too little data
The most common cause of sensor drift occurs when the LiDAR sensor is pointed at a featureless object. This can happen when a directional laser (like the R2A) is pointed at the sky, standing too close to and pointing directly at a flat wall, or getting into too small of a room with little or no objects. Under this situation the SLAM processing simply doesn't have enough information to detect movement accurately.
2. Accumulation of error
There is some degree of micro-drifts that occur over time when estimating your position using SLAM. As the length of your scan increases the micro-drifts can add up.
Now that you know the two main causes for "drift", let's look at technics for Drift Mitigation.
Drift Mitigation: Dense features
Environments with multiple 3D structures and objects will help reduce the amount of drift. Keeping this in mind, featureless deserts like plain stairwells, hallways and tunnels would not be good candidates for SLAM.
Another key is to understand the sensor you are using. Some sensors are directional (R2A) and others will scan a 360 field of view (R360). Both sensor types require a unique way of scanning.
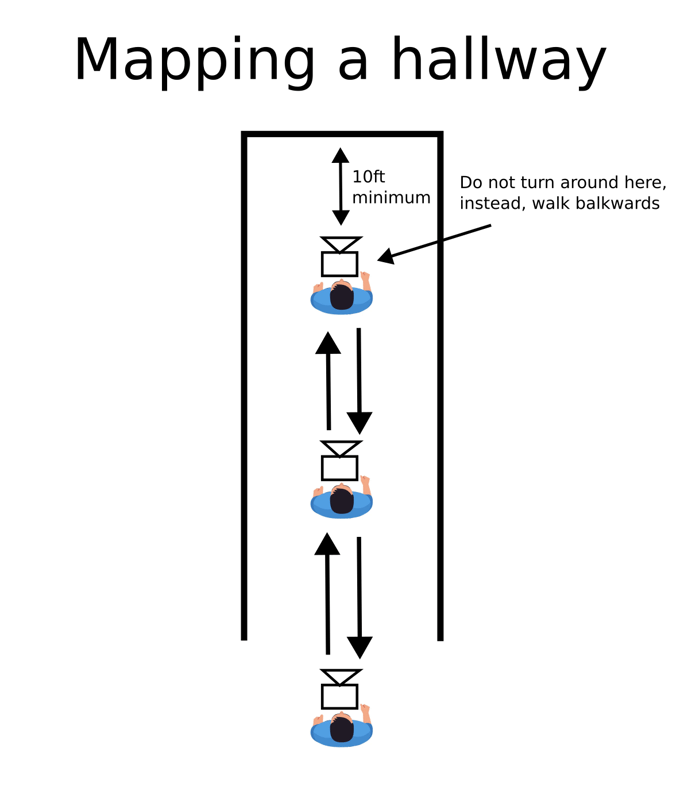
For a directional scanner you will need to pay very close attention to avoid pointing the sensor onto a blank surface (wall or sky are the most common offenders). Below are some techniques for collecting data with a directional LiDAR sensor: (note that the arrows are how you walk and the cameras illustrate which way the sensor should be aimed)
.png?width=688&height=718&name=image%20(2).png)
-1.png?width=688&height=720&name=image%20(3)-1.png)
When using a 360 LiDAR you are much less likely to run into drift from pointing at a featureless wall. This is because even if you get close to the edge of a room, the 360-degree field of view of the sensor allows SLAM to see and localize using features in the rest of the room.
However, when using a 360 scanner be sure the operator's body is not obstructing the scan. The sensor needs to be angled in such a way as to get a full 360 degree field of view.
Other ideas on good feature collecting:
- The R2A Field of View (FOV) is very wide (70 degrees) so you don't have to point the unit directly at what you want to capture. Instead, try to keep the whole unit in front of you. For example, you don't have to scan a building by pointing it straight at the building, you can just walk by it while scanning.
- Avoid areas with symmetrical planar surfaces (e.g. a small pedestrian tunnel with blank walls).
- Don't point the unit directly at a wall or similar surface from close up (within 6 meters or so)
- Always be looking at an open area. For example, when walking down a hall just point the unit directly at the room you're coming from or going into.
- Be sure all doors are open before starting your scan.
Drift Mitigation: Loop Closure
As mentioned above, drift is also caused by the accumulation of micro-errors in the estimation of the sensor's trajectory. One aspect of this type of drift that we can exploit is that it accumulates over time. This means that earlier portions of a scan will contain less accumulated drift than later parts of a scan. Therefore, if we are able to tie the same object from an earlier part of a scan to a later part of the scan we can measure the amount of accumulated drift and apply corrections to the trajectory. This is called loop closure!
As you scan an area, loop back through a previously scanned area. The smaller the loops, the less accumulated error, and the better the loop closure will do at refining the trajectory between the beginning and end of the loop. Just be sure the loop closure portion overlaps by at least 5 meters.
Other ideas on good Loop Closure:
- Break large areas into smaller sections and be sure to practice loop closure between sections.
- Slow down! Walk slow and methodically. This is especially the case when turning the LiDAR sensor. Keep it slow and steady.
- Do not capture more than 30 minutes of data at a time. The Rock Cloud will stop processing at 30 minutes.
- We suggest performing a loop closure every 60-120 meters to avoid drift larger than a few inches.
Finishing your Scan
To stop scanning, simply press the unit's power button just like at the start of capturing data. Hold the unit's power button for 4 seconds to trigger the shutdown procedure. There is no end-of-scan calibration or requirement to go all the way back to the starting point.
Please capture at least one minute of SLAM data to allow for processing.
Do not capture more than 30 minutes of data at a time. The Rock Cloud will stop processing at 30 minutes.
The SLAM scan will not include data within 2 meters- so give some distance between yourself and your scan area. The scan will reach out about 15-20 meters.
How to Process SLAM Data
Please note:
- You can only upload and process one SLAM data set per ROCK Cloud Project.
- If you need to merge multiple SLAM projects you can do that after the deliverables are processed for each project using the Merge Feature in our ROCK Cloud Business Account Subscription.
-
- Make sure to register your unit and subscribe to SLAM Processing
- Create a project in the Rock Cloud
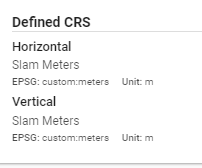
- Use the CRS: SLAM Meters for both horizontal and vertical
- Upload your .data files to your Project Data.
- Enter at least 3 GCPs f you want to be able to align your SLAM Data to GCPs
- Click Process and Order SLAM Processing
- You'll get an email when processing is complete!
SLAM PROCESSING DOES NOT COST TOKENS BUT IS INSTEAD A SUBSCRIPTION BASED ON YOUR UNIT'S SERIAL NUMBER