- In the 3D "Lidar" view on the ROCK Cloud select the pencil tool on the right hand toolbar.

- Select the "Plus" button in the top right to start a classification box.
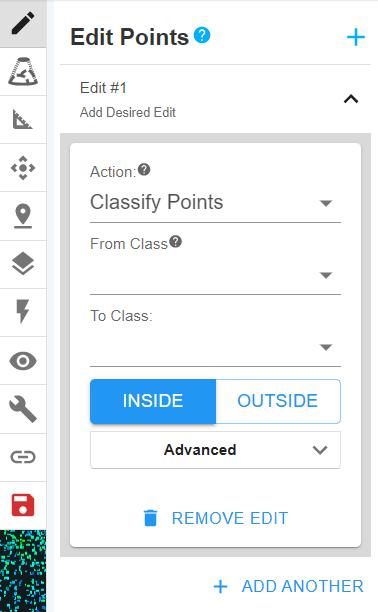
- Choose the action "classify points" in the first dropdown.
- If you want to delete points, change the "Action" to delete and then select "All" or the specific classifications you'd like to delete.
- Adjust the location, size, and rotation of your bounding box with the colored spheres, lines, and arcs to envelope either the points you want to classify or the points you don't want classified in this run by toggling the "inside" or "outside" button. This button can change the selection to inside or outside the bounding box.
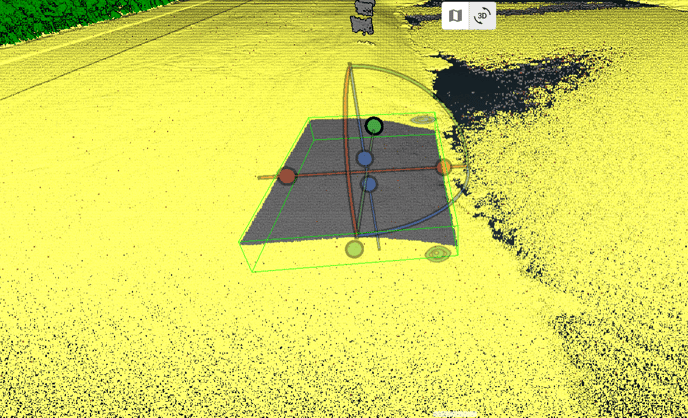
- Below is an example if you choose to classify everything "outside" the bounding box.
-
- Whatever points are in your selection (highlighted in yellow) will be categorized as the point classification you choose or deleted. You'll see the effected points re-colored as white in the below screenshot.

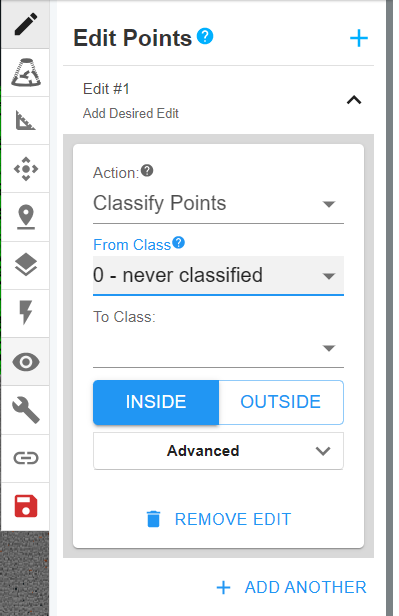
- In the "From Class" drop down - select the starting classification for the points (in this case the points have never been classified).
- Select which classification you'd like these points to be categorized under in the "To Class" drop down below (in this case we are classifying the ground in our dataset).
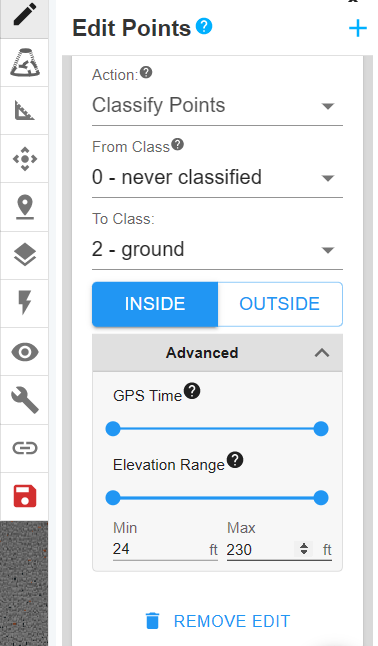
- Under the "Advanced" drop down ROCK added two more filters to help classify or delete points.
- "GPS Time" filters points based upon the GPS timestamp of when the points were collected. Adjust the slider to filter points via GPS Time.
- "Elevation Range" filters points based on elevation. You can set a "min" and a "max" range and also adjust the slider to change the elevation values shown.
- Repeat this process to classify all the points you'd like included in this classification category across the dataset.
Capture all your desired points to classify before clicking save. If you select a set of points, click save, select more points, click save, etc etc, it takes our system longer to run through each set as individual classification requests.
- Click save button in the right tool window.
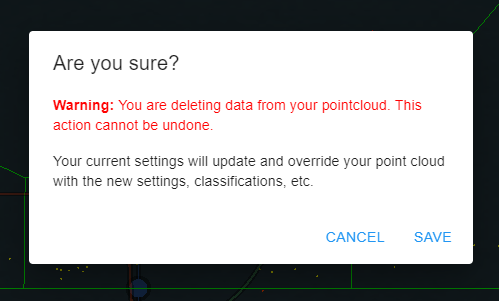
- Click save on the warning pop up in the middle of the screen to reprocess your cloud to include the new classification!
Contact support@rockrobotic.com for any questions or concerns! ROCK ON!!