The workflow below details the workflow for both data collection and processing to complete an extrinsic calibration of your ROCK R3 Pro Colorized SLAM unit.
DATA COLLECTION
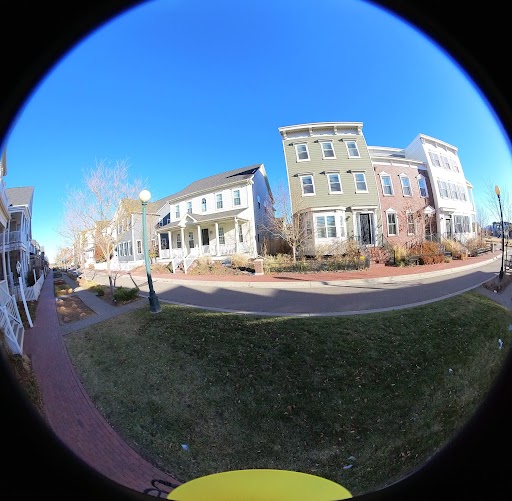
- After setting up your R3 Pro Colorized SLAM unit, set it on a static surface (ex. tripod) facing structures that are within 50-100 feet (see image below). The structure should be at least 2 stories high.
- Start recording data with both the Insta360 camera and the ROCK R3 Pro unit.
- Allow 30 seconds of static data capture while the front camera is facing the "scene".
- After 30 seconds turn the unit around so the back camera is now facing the scene. Let it sit static for 15 seconds.
- After 15 seconds has elapsed, pick up the SLAM unit and walk down and back along your scene. You are trying to "paint" the facade of the buildings in the photo above.
- Return back to where you started and stop data collection on both the R3 Pro and Insta360.
DATA PROCESSING
- Copy the R3 Pro capture directory from the USB to your computer.
- Connect the Insta360 to your computer via a USB-C cable and copy the two insv files from the DCIM directory on the insta360 to the Cam1 directory of the LiDAR data collection.
- Process the dataset as SLAM in "Handheld" mode.
- Hit “NEXT” on the trajectory selection screen (default values are ok).
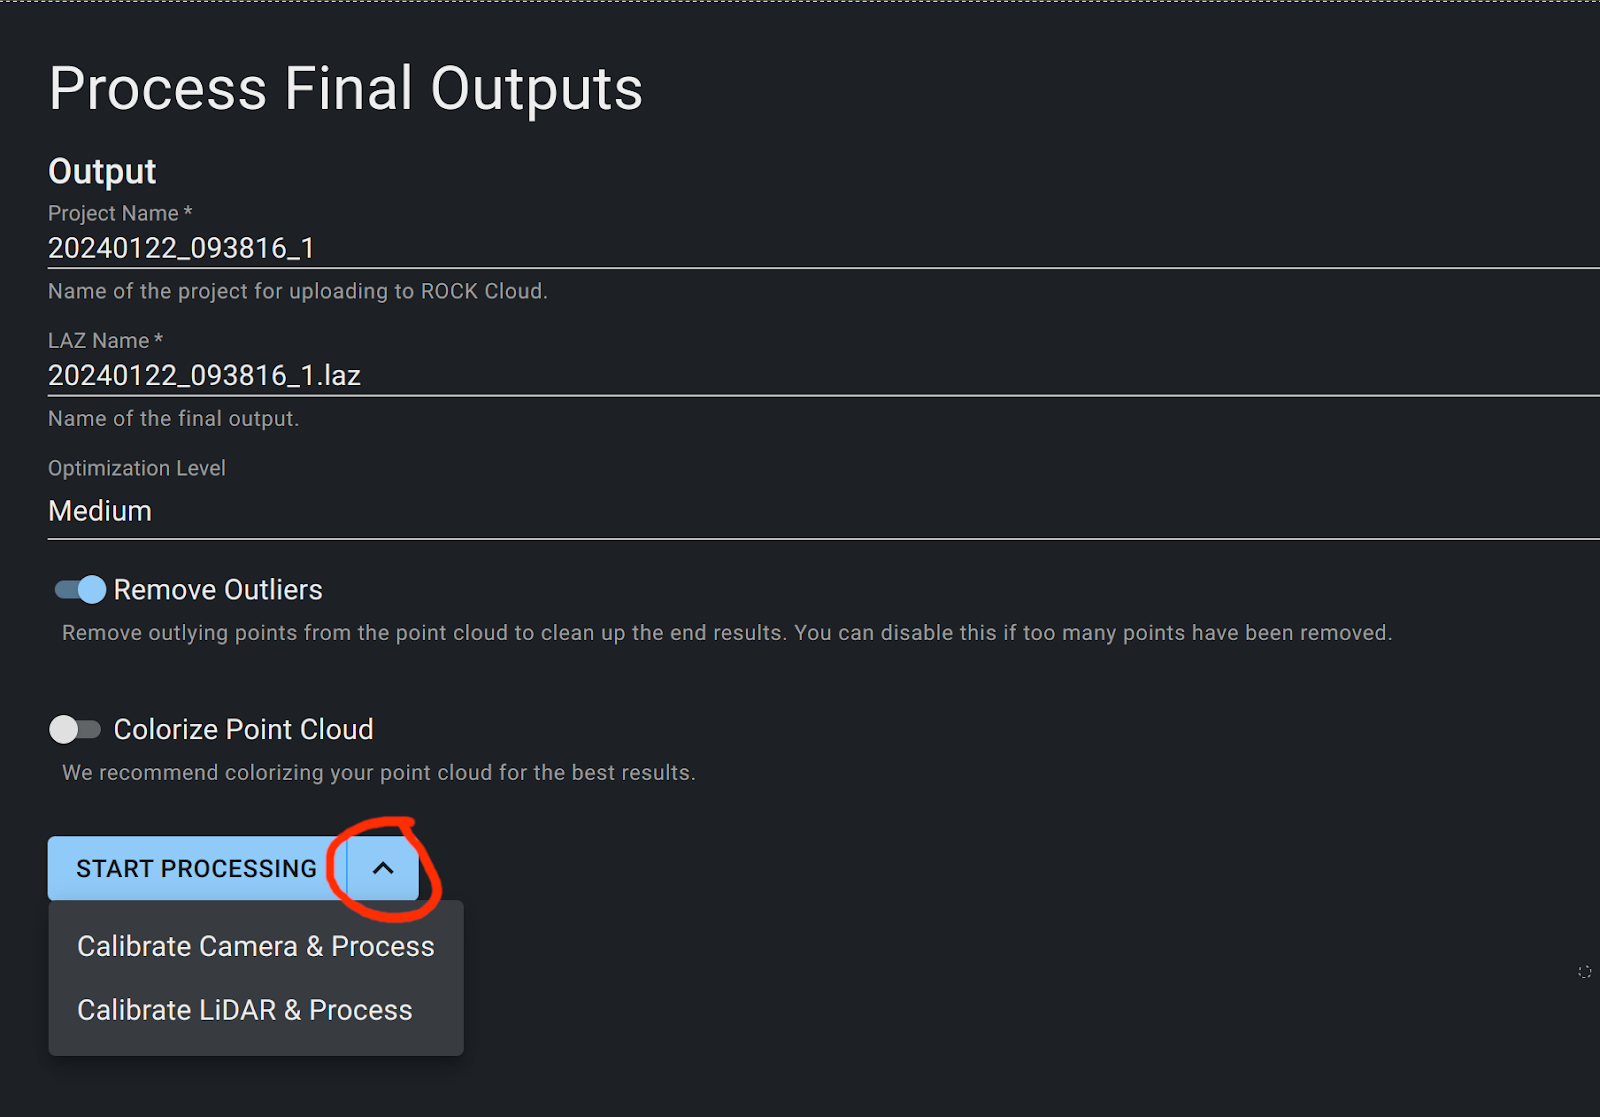
- On the Process Final Outputs page, select "Calibrate Camera & Process."
- Select a minimum of 4 images (two front and two back) from the static parts of the dataset. You want to make sure the images are from both the the beginning and the end of the dataset.
When selecting a photo for the front facing camera select a photo right before you turned the unit around. It can take about 15 seconds from when the data starts to record for a SLAM trajectory to converge. So, pick a front-facing photo at about the 30 seconds mark to be sure you are selecting a photo that has an associated trajectory.
- Process the calibration images, then select at least five calibration pairs on each point cloud. Making sure to select point pairs as far left and right in the image as possible.
- Hit the “Calibrate Camera” button and select "auto extrinsic" or “extrinsic”.
- Check the alignment result.
- If the alignment result is not satisfying, repeat the extrinsic calibration on the same images a second time, making sure to reprocess the calibration images. This time, select 10-20 point pairs for each camera, and select “Extrinsic (Recommended)” calibration.
- At the end of the calibration, project the whole colorized point cloud to check the final quality.