Your LiDAR data may be recoverable if you've had a shut-down error or power failure during collection. Follow these steps if you encounter an empty project folder after unpacking your data.
Review this article to determine why your data collection may have failed.
Follow These Steps to Rebuild Your Project in PCMaster
1. Open a new project in PCMaster and select ALL the .data files in the [data] folder (Transfer your RINEX file as usual)
If you see a data offset error message it will still process but you may miss the final 1% of the capture (if that area happens to be part of your area of interest, then that part will be truly lost).
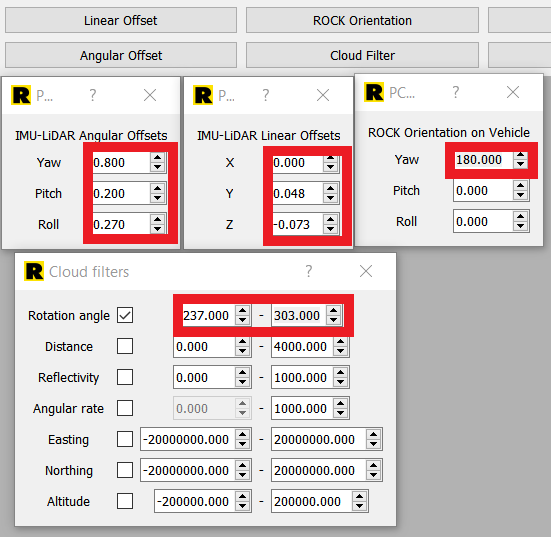
2. Update your specific LiDAR Unit parameters (these will differ from examples in the screenshots) by following the instructions below:
You will want to update the following parameters:
- Linear offset
- Angular offset
- Orientation
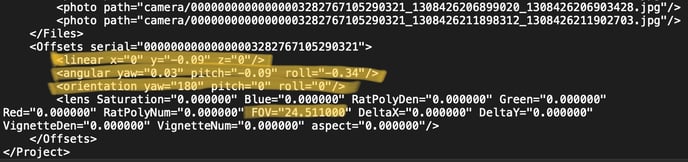
Copy these parameters from a previously completed project by opening it side by side or looking at the ppk.pcmp file in a text editor to see the values you need to update. Then you can paste these into their respective boxes in PCMaster.
OR
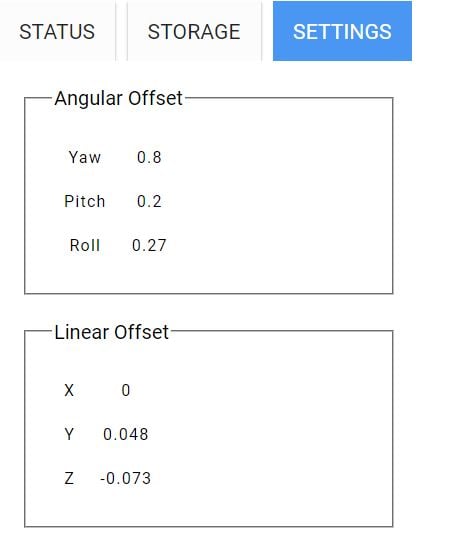
Get them directly off the unit itself and enter into PCMaster.
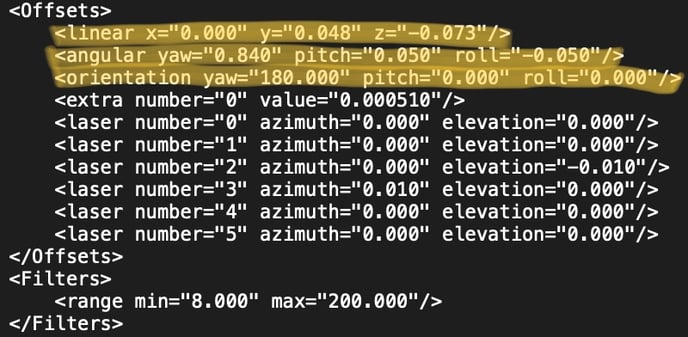
Note: If you're on the latest firmware these parameters should auto populate, but you should double check them.
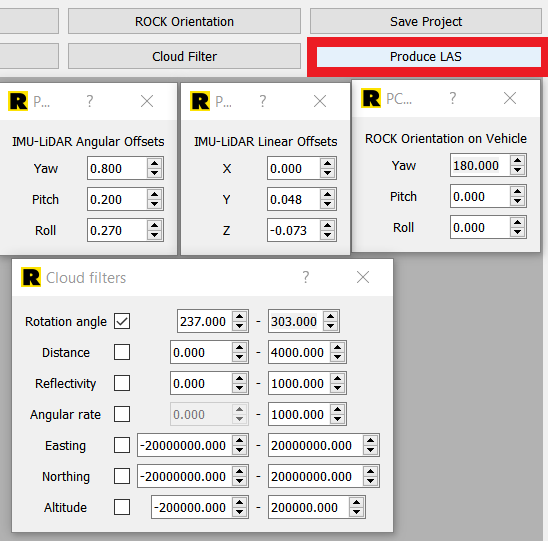
3. Click "Produce LAS".
Now you should have a trajectory corrected .las file with the proper LiDAR unit parameters.
4. Save your project and name it "PPK".
Follow the steps below you want to colorize your .las in PCPainter
1. Open a new project in PCPainter and follow the prompts
- Select Point Cloud titled ppk_cloud_1.las in [clouds] folder
- Select Trajectory titled ppk.txt in [ins] folder titled ppk.txt
- Select ALL photos in the [camera] folder
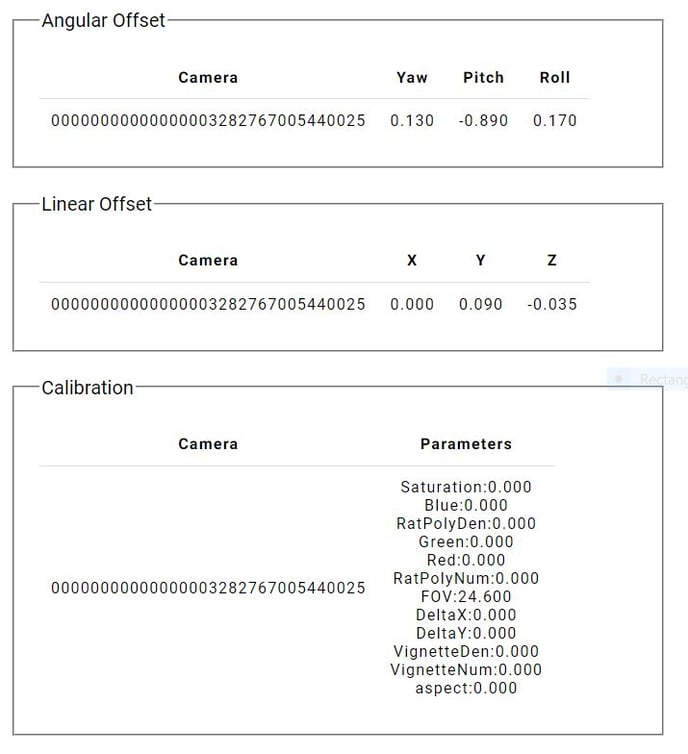
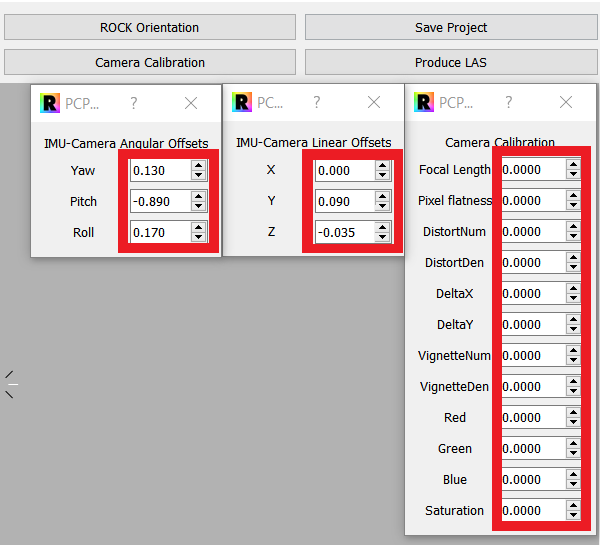
2. Once the visualizer has populated you need to add your specific (will differ from screenshots below) unit parameters back in.
You will want to update the following parameters:
- Linear offset
- Angular offset
- Orientation
- FOV (field of view)
You can do this by copying them from a previously completed project by opening it side by side or by looking at the ppk.pcpp file in a text editor to see the values you need to update. Then you can paste these into their respective boxes in PCPainter.
OR
You can get them directly off the unit itself and enter into PCMaster.
Note: If you're on the latest firmware it will auto populate, but it's still worth double checking.
3. Check your photos and make sure they are aligned correctly to the point cloud.
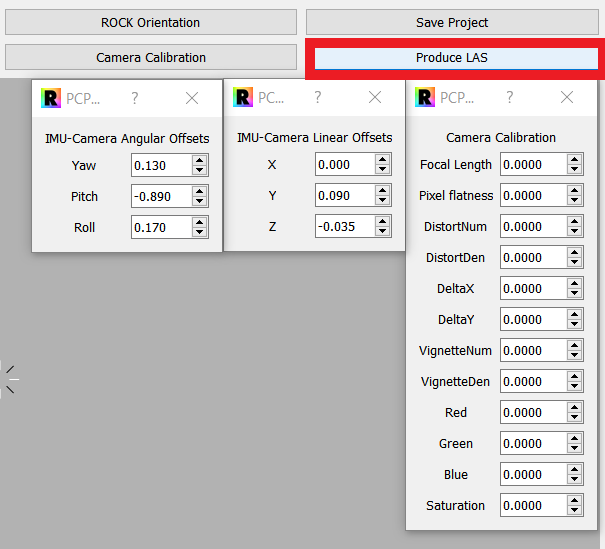
4. Click "Produce LAS".
You should now have a colorized point cloud ready to upload to the ROCK Cloud!
5. Save your Project, call it "PPK".
Have more questions about this topic? Visit community.rockrobotic.com to create a post to ask questions and connect with other community members, as well as the ROCK Support Team.