If you purchased the ROCK Base with RTK access, then your GEODNET setup is already complete.
Register New Account on the GEODNET Web-Console
Open your Internet Browser and go to https://console.geodnet.com.
Click "Sign In/Join" to create a new account.
|
Don’t forget to note this information. Now you can sign into the console. |
Once you have created your new account and verified it from your email, go to the next step.
Add a New ROCK Base
|
|
Click the “Mine” button to add your ROCK Base unit. |
|
Click the "Add Miner" button. |
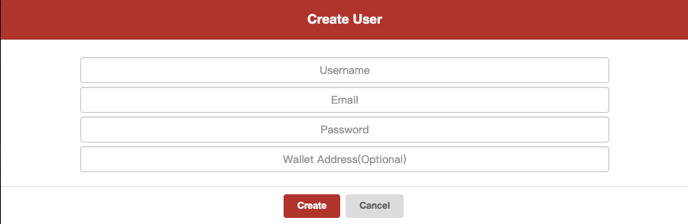
Adding a New Miner

- Enter the number from the Backside of the ROCK Base Station on the sticker. Enter the Miner Key you just created.
- Save your information.
- However, if you only set up your ROCK Base and created your account, you might have to wait a bit for the Geodnet server to recognize your miner.
Congratulations: Now your device is registered on the Geodnet console and visible on the map, ready to mine and get rewards.
Procedure after registering the miner and how it is available in the console afterward
- If you do the setup of the ROCK Base/miner and register it on the console at 50 minutes past the hour, then in just 10 minutes wait, your ROCK Base/miner appears on the map, and all details start showing up except the number of satellites.
- The same situation applies if you register the miner on the Geodnet console at maybe 10 minutes past the hour — then you need to wait for 50 minutes before the ROCK Base/miner shows up on the map.
- The number of satellites will start showing up after 3 days of your unit being online, and the ROCK Base/miner goes to stable on the seventh day after installation (as long as you have been online in the last 3 days before the seventh day).
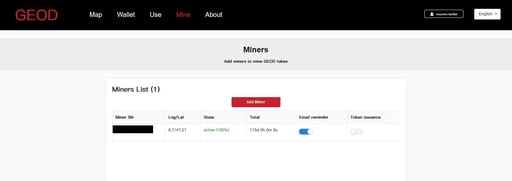
Explanation of the individual functions under "Mine" / "Miners
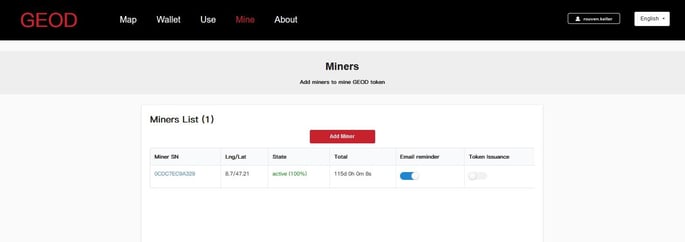
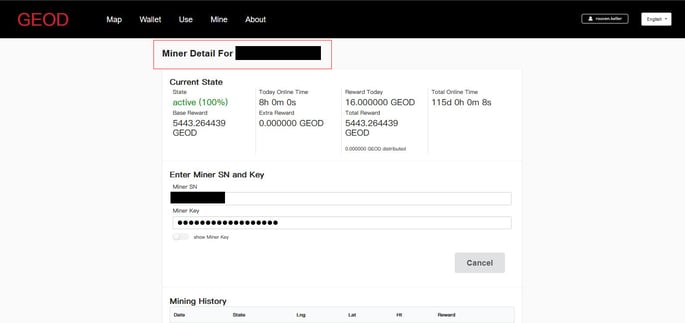
- Miner SN - Clicking on the blue Miner SN number opens a new window with the details of the ROCK Base/miner.
- Lng/Lat - displays your unit's geographical location.
- State - displays the status of your unit.
- Email Reminder - If enabled (blue), you will automatically receive an email when your ROCK Base/miner falls below Sat No 20 or is no longer online in the network.
- Token Issuance - If "Token Issuance" is switched on, your daily rewards are automatically forwarded once a day to your wallet stored in your account.
Explanation of the individual functions under “Mine” / “Miners”
- Extra Reward - This function is for units with advanced features and is not active for ROCK Base units.

Click “Map” to enter the GEODNET map.
Explanation of the individual functions on the GEODNET Map page
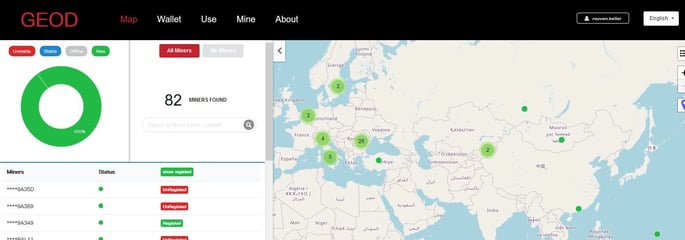
- Pie Chart section (top left of screen) - Select which miners you want to see or which status group should be displayed.
- All Miners/My Miners section - Here, you can choose whether you want to see all or just your device, the map adapts to it.
- Miners section (bottom left of screen) - Shows all available devices and the status of each device.
- Map section (bottom right of screen) -
- When selecting "All Miners," all registered devices are displayed in with the corresponding status on the map.
- If you select "My Miners" and then tap on one of your registered devices, it will be displayed on the map with the corresponding status, and the map will zoom to the location.
- To ensure the privacy of the user, the location of the unit is shifted by a few hundred meters.
Explanation of the display under "Map”
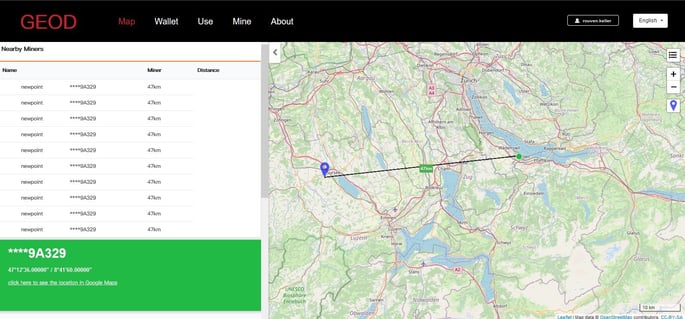
- Three Horizontal Bars button (top right, under Language) - Show/hide top menu bar.
- Plus/Minus buttons (under menu button) - Zoom in/Out on the map.
- Purple Location Marker button (under zoom in/out button) - Measure Distance on/off + flip sidebar.
- Purple Location Marker On Map icon - Shows location and distance to the nearest device from your device.
Explanation of the display under "My Miners"
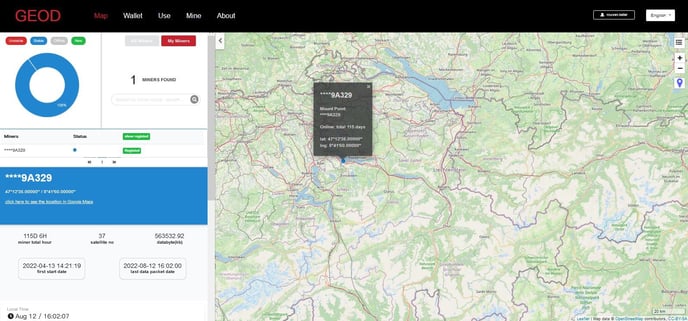
Information in the bottom left section of this screen:
- Miner Total Hour - Total runtime of the miner since registration and commissioning.
- Satellite No. - Number of satellites seen
- Databyte (kb) - Amount of transmitted data
- First Start Date - Date of commissioning + registration to the console
- Last Data Packet Date - Time of transmission of the last data packet
- Local Time - Current time at the Miner's city location
Explanation of the Hourly Rate + SNR
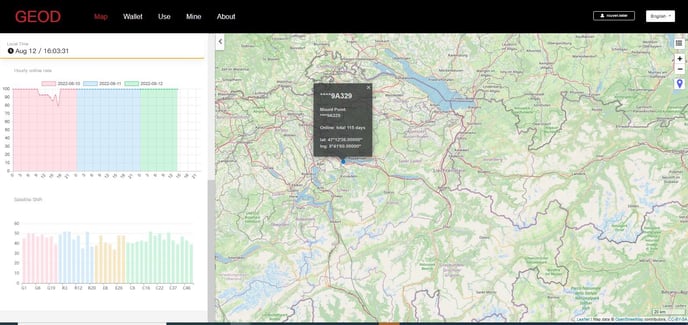
- Top Left Graph (colored blocks) - Display of transmission hours and any interruptions in the network
- Bottom Left Graph (colored bars) - The GNSS signal travels from the GNSS satellite around 20,000km away, and arrives in GNSS receivers (miners) with very weak power.
- The GNSS signal can be easily affected by environments.
- To maintain a decent quality GNSS network, the GNSS antenna should be installed at open-sky view without any obstruction.
- Any bad factors will result in a bad GNSS signal quality.
- In the back-end system, GEODNET will monitor the GNSS signal quality and issue token based on the GNSS signal quality in the future. GEODNET adopts the GNSS signal SNR on L1 as an indicator for each tracked GNSS signal quality. Please refer to the attachment (also https://insidegnss.com/measuring-gnss-signal-strength) for details about GNSS signal SNR.
- Typical GNSS L1 SNR for each satellite should be from 37-45 for an acceptable installation.
- The GNSS signals with SNR below 32 will not be used in GEODNET backend algorithm.
- The screenshot is the GNSS SNR signal from one online miner.
Explanation of the + SNR
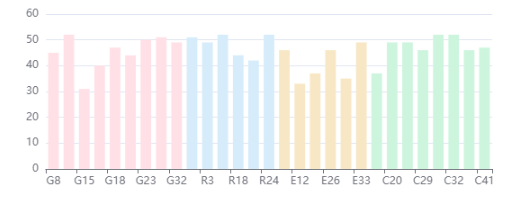
- G = GPS
- R = GLONASS
- E = GALILEO
- C = BDS (Beidou)
- Other Systems
- J = QZSS/QZS
- S = SBS/SBAS
- Letter stands for system; the number stands for specific satellite if the system (G01 = GPS #1)
Wallet
To add your own wallet in the GEODNET console, click "Wallet."
Now the window opens to add your own wallet in the console.
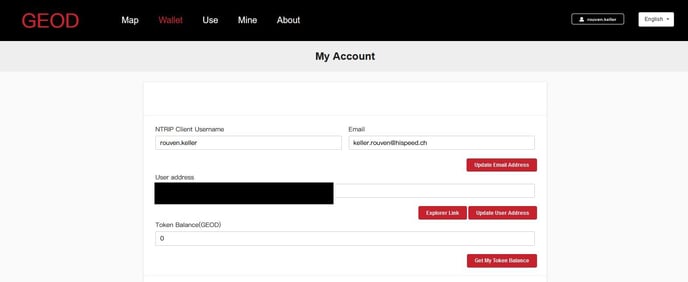
- User Address -Enter your own wallet address here and then confirm this with "Update User Address."
- How to create a wallet using MetaMask is explained in detail following this topic.
Note other wallets that support ERC-20 tokens can be used.
MetaMask is just a very popular choice.
Next Step: