The ability to set a custom site projection is useful for site-specific reference systems based on a location unique to your site or customer.
Follow these steps to establish a custom site projection:
- Go to the Manage Project tab in your project
- Set your CRS (Coordinate Reference System) as you normally would when creating a ROCK Cloud Project
- Click Edit under the Manage Reprojection tab and then select "Search"

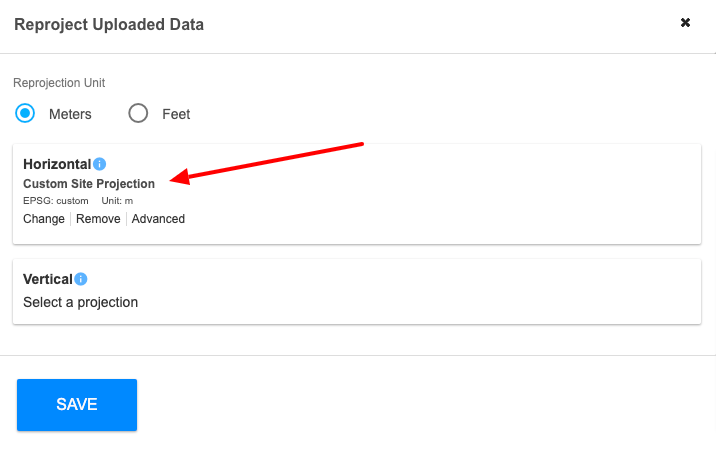
- Select desired unit of measurement (meters or feet) then type "Custom Site Projection" for the Horizontal Reprojection.
Now you'll need to add at least 3 GCPs (more is better) with the custom coordinate. These will be used to create and apply a single transformation to the entire dataset via a 4x4 transformational matrix.
All GCPs that you enter must have a custom x, custom, y, and custom z. You cannot mix and match some with the custom parameters and some without.
To enter your custom coordinate GCPs:
1. Within the Project Management tab, click edit "Manage GCPs"
2. Select " Show Advanced"

3. This will expand the GCP information to include the Custom X, Y, Z fields. Use at least 3 GCPs collected in a well known projection and then specify the equivalent coordinate in your custom projection in the custom X, Y, and Z fields.
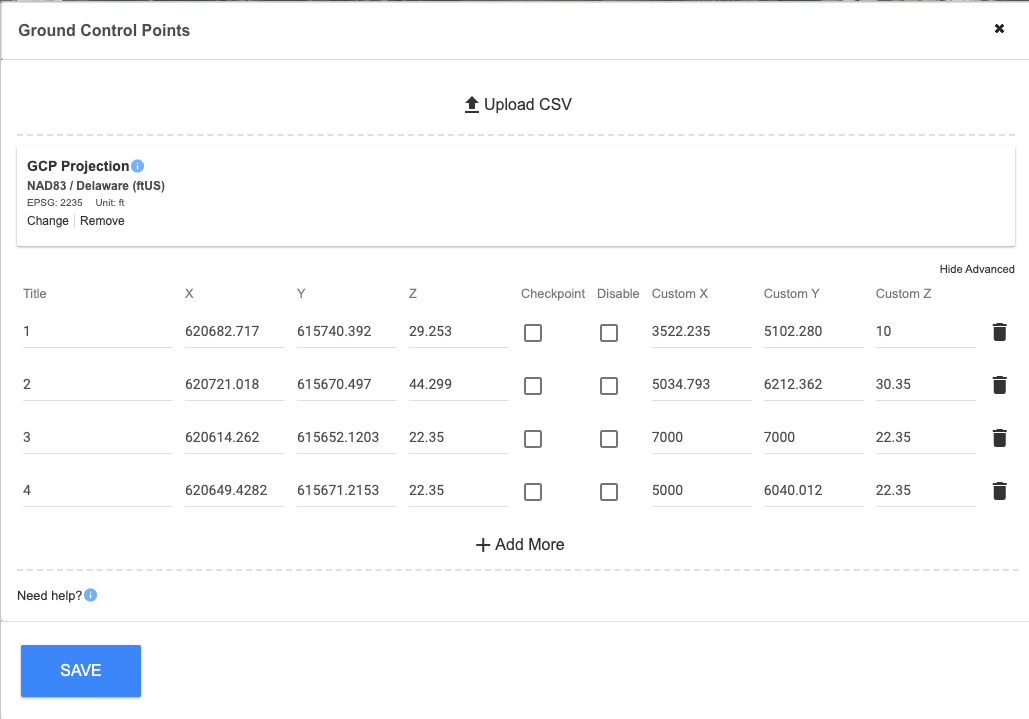
4. Don't forget to SAVE!