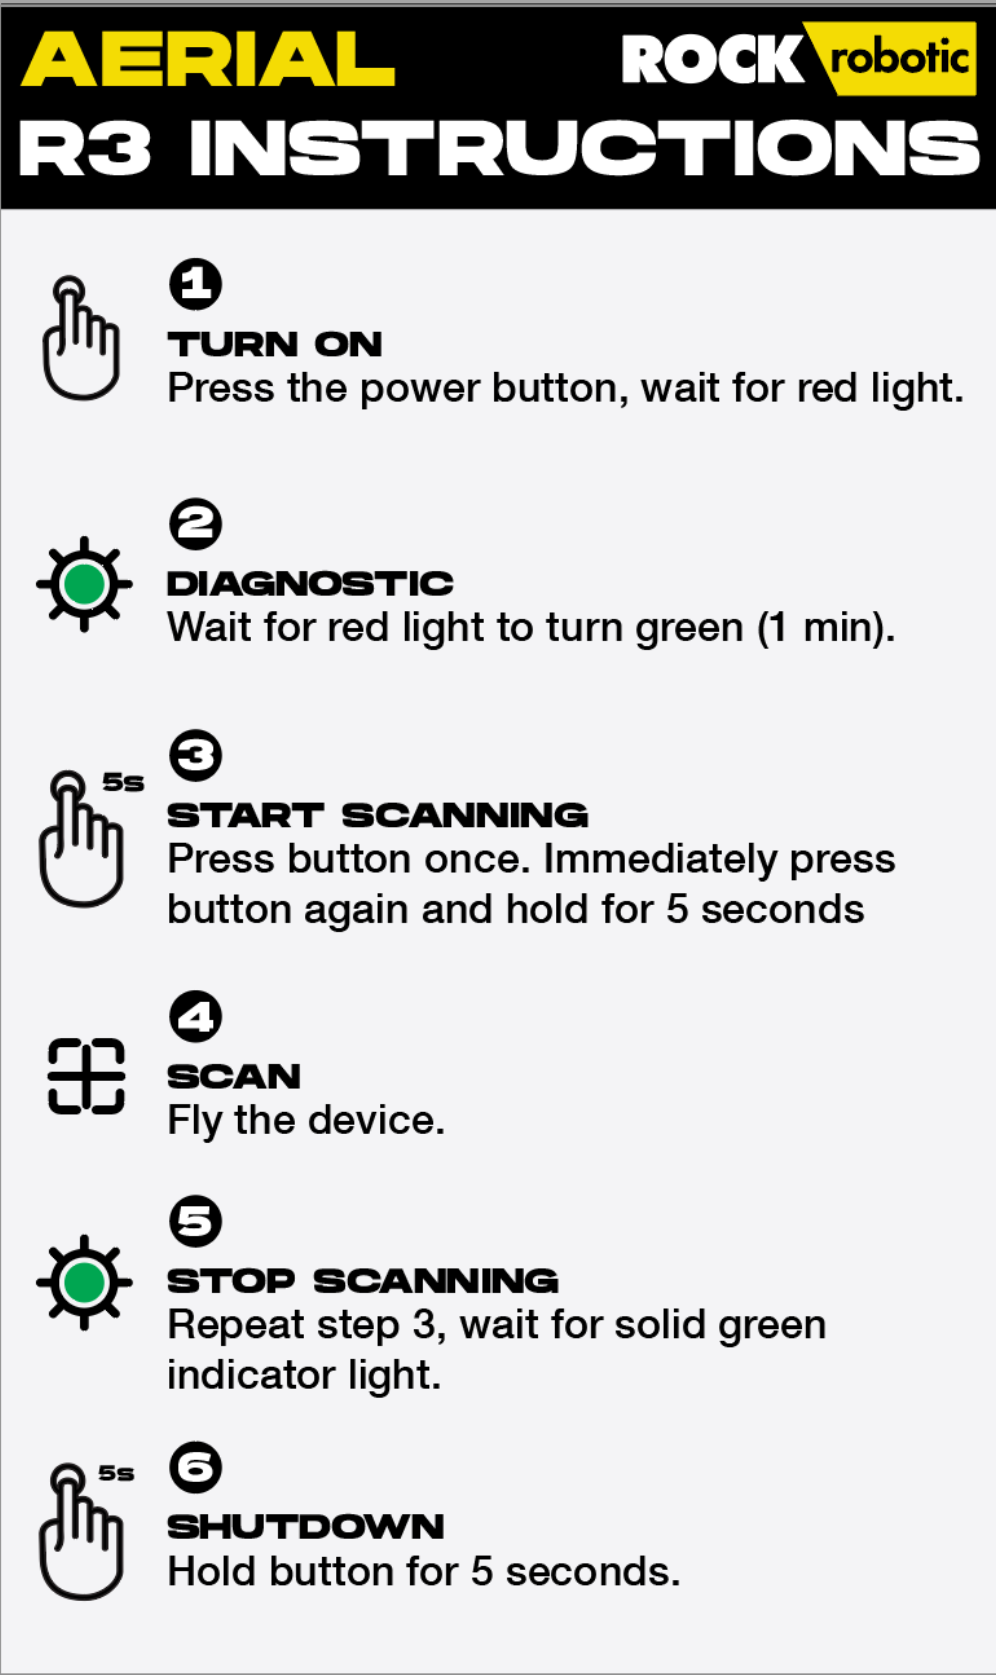
Step 1: (Power ON). Push the button - light will turn red, this is your unit performing a self-test
Step 2: (GNSS FIX). Wait for Light will turn solid green. When solid green the unit has passed self check and has acquired fix on GNSS satellites. - should be about 1 minute
Step 3: (Start). When the light turns green, press the button once and release. The light will alternate flashing red and green. Immediately press the button again and hold the button for five seconds until the light turns flashing green and then release the button. The Lidar is now collecting data.
Step 4: (Wait). On the drone in aerial mode, the camera will take about 30 seconds to initialize and then you'll hear it taking photos. The camera is quiet, but you'll know it's ready to go.
- For Drone, proceed to fly your calibration flight. 5 seconds fast straight line and the figure 8.
On SLAM, you'll hear a beep every few seconds and you'll know it's ready to go.
Step 5: (Stop). To stop collecting data, press the button once and release. The light will alternate flashing red and green. Immediately press the button again and hold the button for 5 seconds. Wait for the blinking green light to change to solid green indicating the dataset has been saved.
Step 6: (Power OFF) Shut the unit down by pressing and holding the button until it powers off.