The R2A needs to converge the GNSS and IMU prior to capture for optimal results. This is called calibration.
Part 1: Static Alignment
- Turn on the R2A/R360 and "Start" recording. The interface should say, "Static Calibration".
Do you hear your camera's shutter? If not check that it initialized properly on the "status" page of the GUI.
-
Wait 5 seconds for the interface to say, "Waiting for high velocity".
Part 2: Kinematic Alignment
- Take off vertically going straight up from landing zone, using minimal to no lateral movement. Increase altitude to a safe height.
- Then fly forward in straight line at greater than 5 m/s for at least 5 seconds.
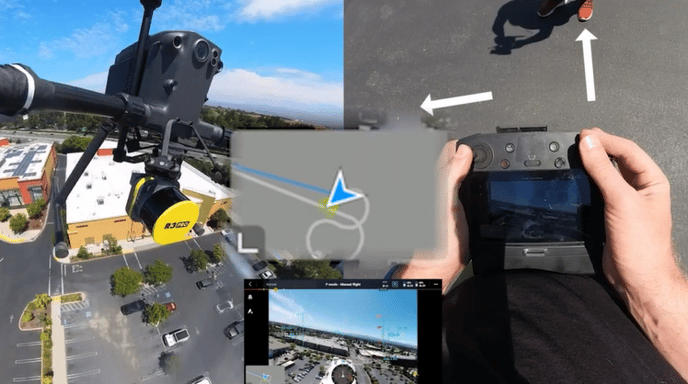
- Then fly at least 1 Figure 8 pattern in the sky at a fixed altitude with the camera forward, just like an airplane at a speed of at least 5 m/s. Calibration Maneuver Complete!
Fly your mission
Great! Now the LiDAR is calibrated and you can begin flying your mission plan.
Part 3: Return to Home
At the end of your mission, return to the landing zone at a speed greater than 5 m/s for at least 5 seconds . As you approach your landing zone, do not exceed 3 m/s horizontally while you descend for landing. If you are using an M300, you can use the Return to Home feature and it should provide a sufficient end flight calibration.
Then follow these steps:
- Static alignment - Land and don't move the Aircraft and/or LiDAR for at least 30 seconds.
- Turn phone WiFi back on and connect to ROCK LiDAR's WiFi network.
- Connect via the web interface (192.168.12.1)
- "Stop" collecting data using web interface.
- "Shutdown" the R2A.
If you DON'T "Shutdown" the ROCK LiDAR you won't successfully write your unit specific parameters (boresight & camera alignment) to the trigger files contained in the project folder, and you will have to Pre-Process the job the LONG way.
Special Consideration: Mid-mission Battery Change (Hot Swap)
If your mission will require multiple battery changes, return to the landing zone referring to Return to Home Procedure. In the event of a bad hot swap you can use this as your stopping point for cloud processing.
Change the batteries as soon as possible after landing. If your drone is one the ground for great than 1 minute during the hot swap process, you will need to end data collection and start a new data collection.
See the article How to Hot-Swap Batteries on the M300 for more information, including a video.
No need to re-fly your Figure 8s if you didn't power cycle the unit during the hot swap. Just fly back to the last point collected in your mission and resume.