Before heading out to the field for data collection, please be sure that you have activated your ROCK Desktop license on the computer you will be bringing out to the field with you.
Fly your LiDAR mission and log your base GPS data.
- Data collection workflows for the R3 Pro V2 and R3 Pro LiDAR units.
- Logging RINEX with your Emlid Base GPS unit.
- After your flight, stop logging on the EMLID (or your base station) and download the RINEX data onto your computer.
- Put the LiDAR data from your USB drive, and RINEX data on your local drive. Do not store the data on the USB or in a Cloud service like Dropbox or OneDrive, etc.
Process and Inspect Data in ROCK Desktop
- Open ROCK Desktop, select your local folder with the LiDAR data.
- Select your base RINEX data
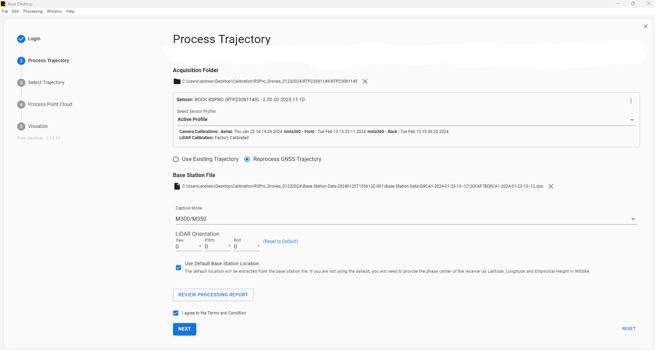
- Let ROCK Desktop Process your trajectory, this shouldn't take long for most missions.
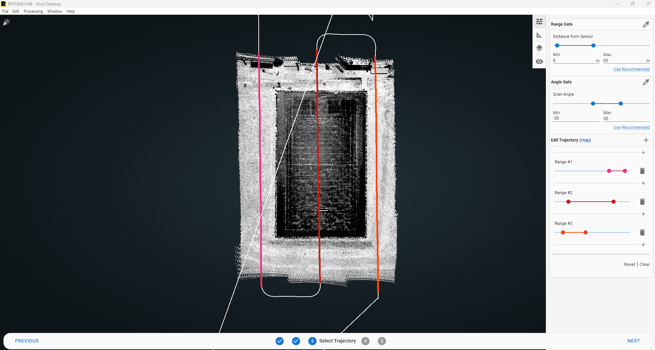
- Once the trajectory is calculated, you can see your point cloud data in ROCK Desktop.
- You can use these steps to ensure you can see all the data properly in the strip selection stage.
- Ensure your capture is suitable to your project specifications.
- If you are satisfied with your point cloud, you can pack up your laptop and finish processing later. You can also let your dataset continue to process on your laptop while driving back from your field site.
What if there are processing errors?

If you receive a processing error when checking your data in the field, you can review common causes and things to check here. If it is determined that you need to re-fly your site, the good news is that by completing the field check process you have saved a frustrating return trip to your site.